hello all who stumble across this blog.
so its been a slow build because i have time and am lazy, however the incubator or "coolerbator" ha ha is built. i built this incubator, not of my own design. but rather based, no rather stolen dezigne from Damon Salceies. here is a link to the youtube video from where i took the dezigne.
https://www.youtube.com/watch?v=6iPXnA3Z5tA
no there are a few differences in my incubator, and his. and they are basicly a 1/3 scale version of the incubator in the video.
so i started out with this 52ct marine igloo cooler. i wanted the large 120ct like in the video but this cooler offered everything i was looking for, and since i was only looking at incubating one clutch, i decided to go this route. this cooler was only 50 bucks, compared to the 3x larger 120 cooler for 150 bones.
now what i did here was make the pvc frame, smaller to fit my smaller cooler of course, and wrap it with the easy heat freeze protection chord..
you can find that here:
http://www.morelectricheating.com/default.aspx?page=item+detail&itemcode=EASY10164&gclid=CjwKEAjwpLa5BRCTwcXS6_rpvC4SJACTDQMMGI7JjO2UFc0gAD5YPvl1IFe_NqvH8Q4CM0iW1QPhjhoCQSHw_wcB
placed the frame and chord on the bottom and then cut out the light grating i think it was 12 bones for a 4x8' sheet.
now on top of that sets three stainless steel trays i picked up from the websturant online store. here's there link:
http://www.webstaurantstore.com/1-4-size-standard-weight-anti-jam-stainless-steel-steam-table-hotel-pan-2-1-2-deep/4070429.html
on top of those set another pvc frame, im using 3/4 pvc round tube also here in this picture you can see the air stone in the center tray
ok, so on top of that sets another light grating. under which i zip~tied two cpu fans i picked up off amazon for 15 bucks. i wired them up together and then wired them to a simple two pron cell phone charger, ad they work great. no sweat.
so here is a picture of the final result. i skipped a few steps but you should be able to get the idear. i bought three cheap thermometers to monitor the egg box temps. they are resting on the acrylic sheets i cut to fit. i used a jig~saw and a pvc cutting blade to cut it to shape and used a da~sander to sand the edges to fit snug and perfect. i also got the polycarbonite tubs from the websturant store, here is their link:
http://www.webstaurantstore.com/1-4-size-clear-polycarbonate-food-pan-4-deep/700PLPA8144.html
and i bought matching tops to go with them. they are a real sturdy tub, very clear and i really like it.
here is another actual reptile incubator egg box. i would have bought these if i had seen them before i purchased the other tubs.
http://www.simcontainer.com/gallery.html
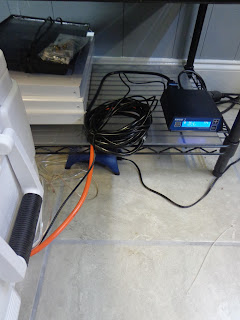
got all kind of wires and things coming out of the bottom, but i have them organized as best i can, and the easy freeze chord plugged into my thermostat. im using a Herpstat 1 from spyder robotics. personally my favorite thermostat on the market. not cheap but certainly worth the moneys.
http://www.spyderrobotics.com/index.php?main_page=index&cPath=1
in closing i will say that my poor gravid lunabell is due to lay around the 15th. im pretty excited and look forward to that. this incubator was pretty neat to build. it wasn't cheap but i believe it will be worth the moneys. now, in the Damon's video he advocates the use of a thermistor, which i did not buy, im not going to run the thermistor, i have read mixed reviews on their capability in a 100% humid environment, on top of that they are expensive, and used for the temp flux incubating method, which i am not going to do. i will be baking my eggs straight 87.5* for the duration. check back for the forthcoming eggs, yo.
Brandon


No comments:
Post a Comment